Creating homemade Christmas ornaments in our home is one tradition I have loved to do with my kids since they were little. This year we decided to try melted bead Christmas ornaments, which are not only fun to do, but simple enough for kids to help and create. Be ready for the oohs and ahhs when the family sees these impressive, yet simple handmade Christmas ornaments on your tree.
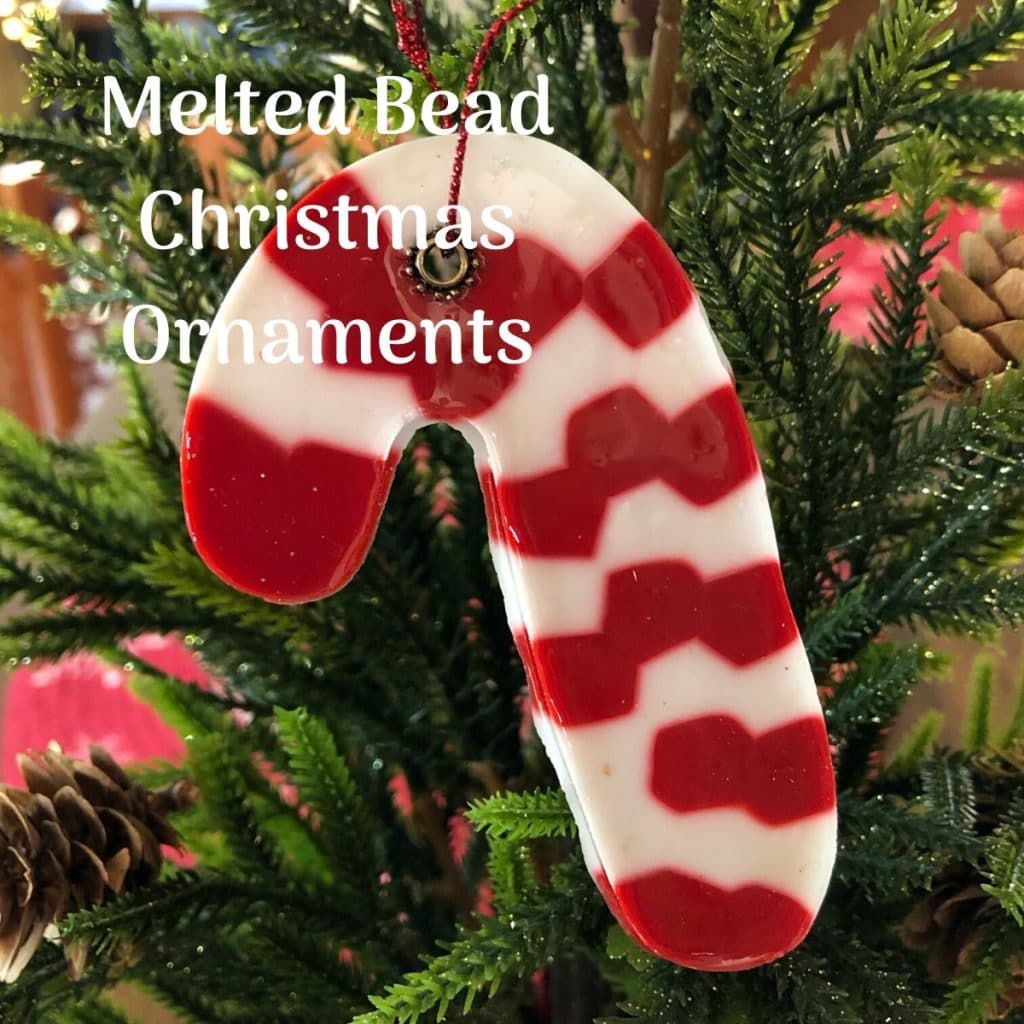
These tree-worthy homemade melted bead Christmas ornaments will impress even those that insist on store-bought only ornaments on the tree (my husband). And your kids will have lots of fun creating them!
My boys were meticulous about putting the beads exactly where they wanted them, whether it was to make a pattern or choosing their favorite colors. And it was so quiet as everyone worked to holiday music playing in the background. It was such a festive afternoon!
Materials needed:
- PLASTIC PONY BEADS- multiple colors are fun and are sold in packages with them all mixed together or individual color packages. Get clear and translucent beads if you want to create the stained glass looking ornaments. We went for mostly solid colors to create our ornaments.
- TIN FOIL - line the pans with tin foil to keep the beads from sticking to the pans.
- COOKIE SHEETS OR CAKE PAN - Use whichever metal pans you have at home.
- GRILL OR TOASTER OVEN - We used a gas grill, but a toaster oven plugged in outside on a safe surface should work as well. Whichever heat source you choose, I would advise to use it outside as melting plastic creates fumes.
- METAL SPACERS - Plan to use one for each ornament. These can be found at your local craft store in the jewelry making section. Be sure they are metal so they won't melt.
- METAL COOKIE CUTTERS - metal or copper cookie cutters work well for this project. Do not use cookie cutters with plastic on them. Do not reuse the cookie cutters later for cookies.
How to make melted bead ornaments
MELTED BEAD CHRISTMAS ORNAMENTS
Equipment
- Gas Grill
- Cookie Sheets
Materials
- Plastic pony beads Assortment
- Tin Foil
- Metal cookie cutters
- Metal spacers (1 for each ornament)
Instructions
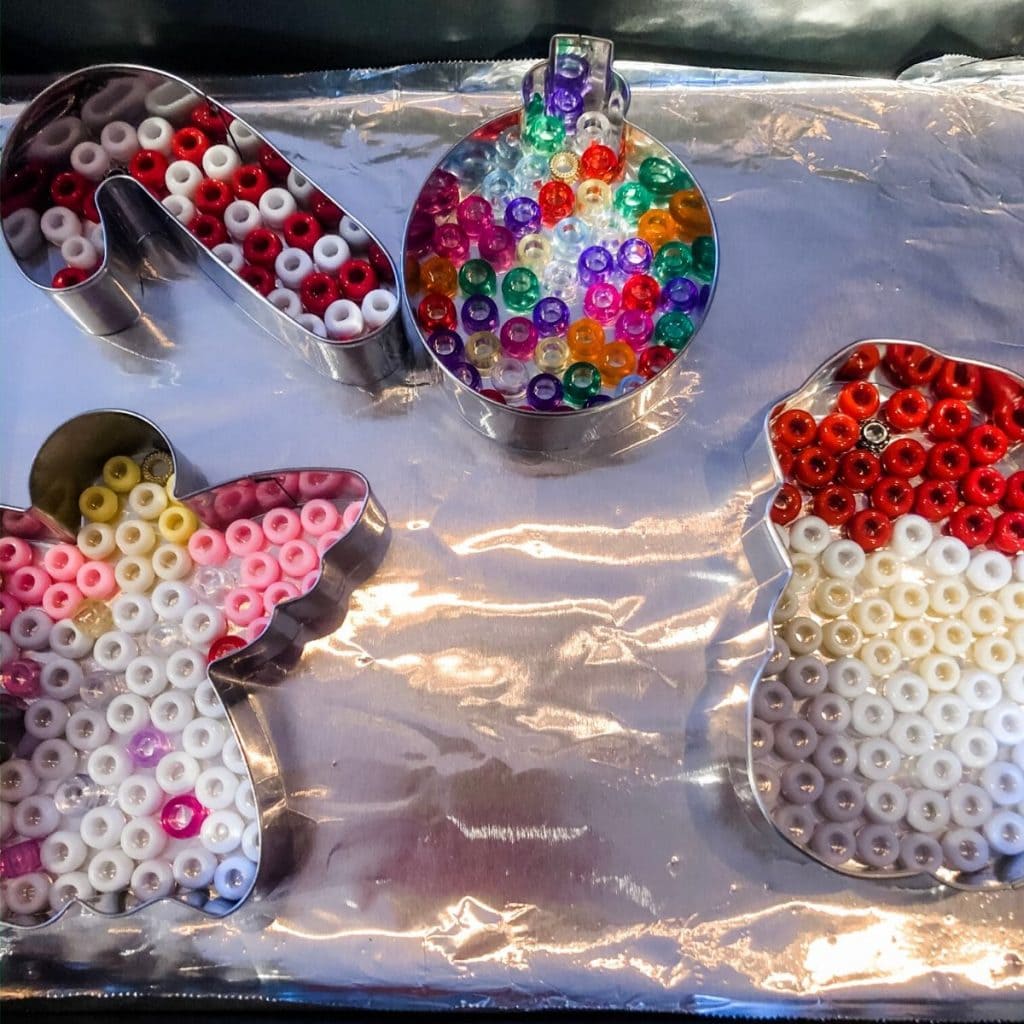
- With tin-foil lined pans, place the cookie cutter on the tin foil.
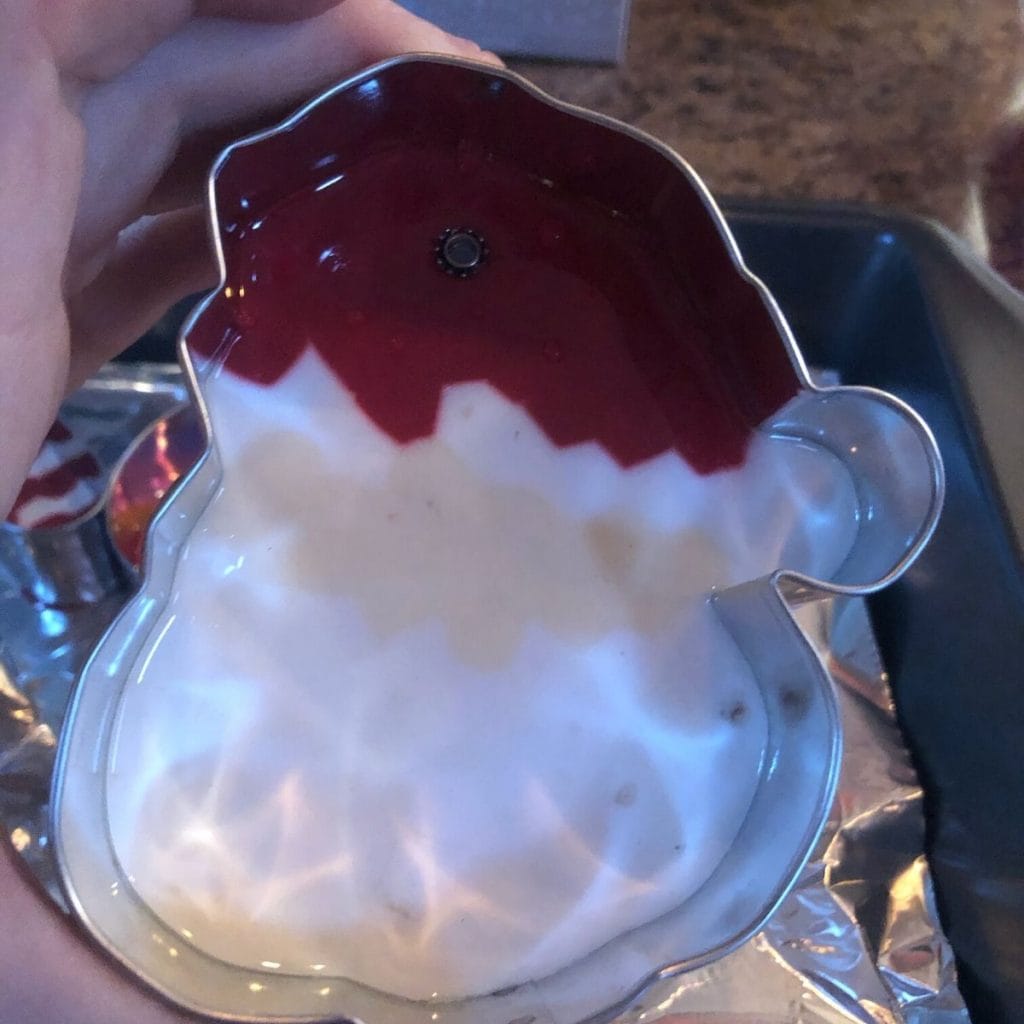
- Place or pour in the pony breads. My kids loved this part. Taking their time and making each one just right; or when they were nearing the end and getting tired, they would pour the beads in which created a cool stain class look.
- Using a bamboo skewer, a toothpick, tweezers or patiently with your finger, stand the beads up to all be facing the same way.
- Put a metal spacer near the top of your ornament. This will not melt and will form the hole to hang it on your Christmas tree!
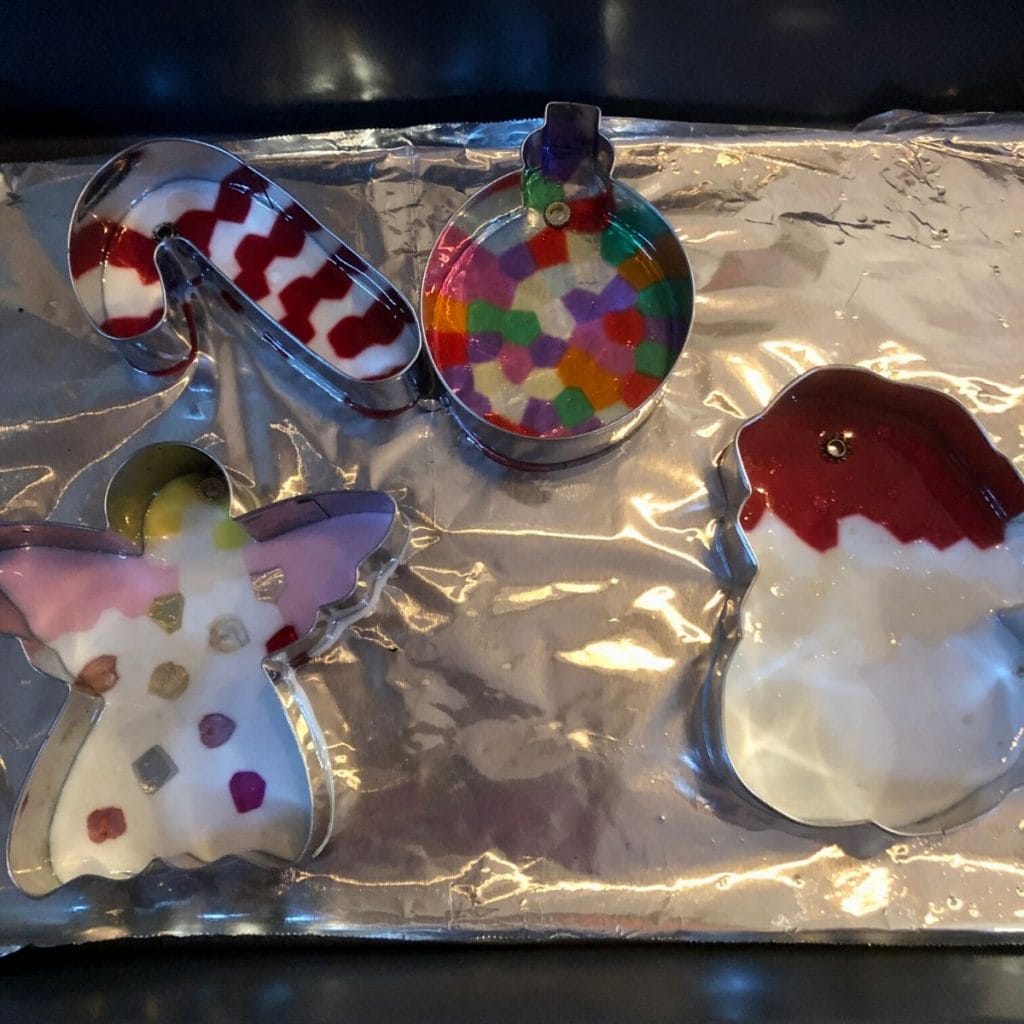
- Put the pan on your grill. Turn the grill down low and/or only turn one burner on.
- Each ornament can take anywhere from 10 to 20+ minutes, it depends on your grill/heat source. Check often.
- When melted to your satisfaction, using oven mitts and/or tongs, take the pans off the grill and onto a trivet to cool. Do not place directly on your counter as it will be hot!
- Once it cools to the touch, flip the pan over and gently push the ornament out of the cookie cutter mold.
- Let it cool completely.
- Slide a piece of ribbon through the top of the ornament and it’s ready to hang on your Christmas tree!
Notes
Melted bead Christmas ornament pro tips
- Use tin foil
Having not done this before, it was actually a little trial and error trying to figure things out. At first, I put the cookie cutters directly on a cake pan. Filled them with beads, melted it on the gas grill, but when it was time to pop them out.. Some of them wouldn't come out!
We made a beautiful Christmas tree that looked so nice on the grill, but broke in half when we tried getting it off the pan, because the beads melted right into the pan. Needless, to say, both ended up in the trash can. Going forward, we lined all the pans with tin foil. A much better plan!
- Put metal spacer near the top
The first ornament we completed, we put the metal spacer at the very top of the ornaments. If the spacers are metal, they won't melt.
We realized the beads weren't actually melting around the spacer, because it was at the top. By pushing them together, when it was on the grill, we got the beads to melt around the spacer.
Going forward, we made sure to put the metal spacer in between a bunch of other pony beads.
- All beads should be facing circle up
If you love the uniform look of all the beads melting together in the same way, be sure that all the beads are 'standing up' or circle up. In a few of our 'sun catcher type ornaments' the beads were facing any which way, and you can see that in the finished product. Of course, if you have kids and that's how they want it, then that will do.
- Cupcake pan for sorting
There are so many different colors, you may want to try using a cupcake pan for the beads to keep them organized while you work.
- Googly eyes
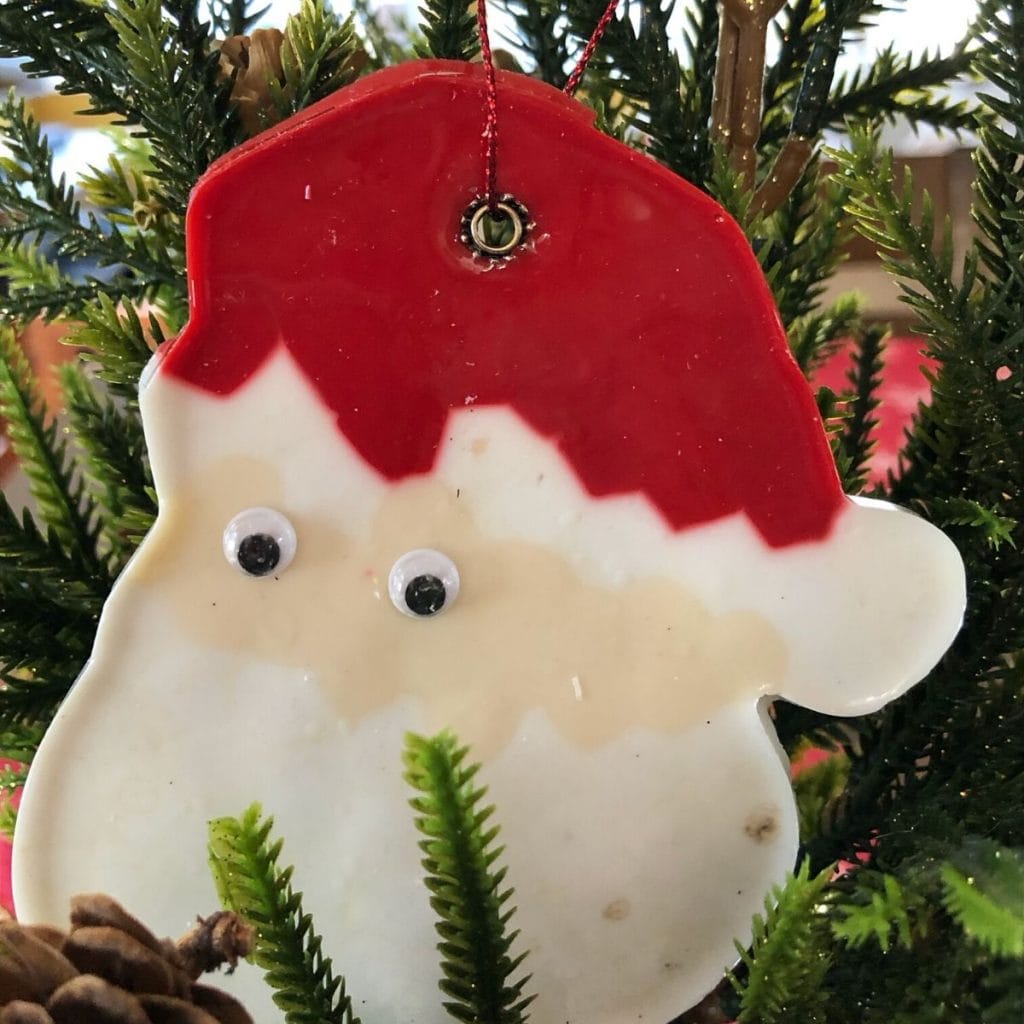
To create a fun look, try gluing a couple of googly eyes to your ornament, once they are cooled off.
What to do with leftover beads?
Have leftover pony beads? Keep them for the spring and create stained glass sun catchers for your windows. Pass them on to a friend to create homemade bead ornaments too. Or save them for next Christmas to make more melted bead Christmas ornaments!
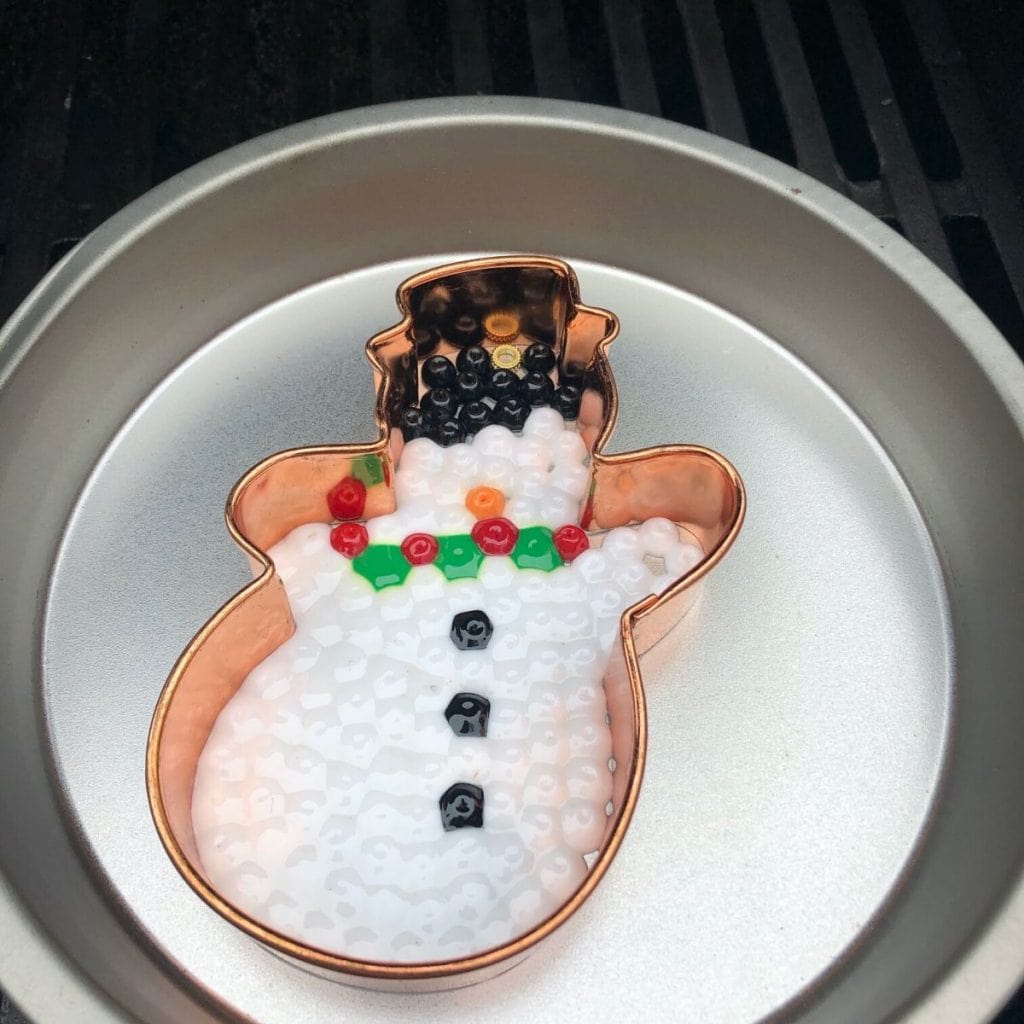
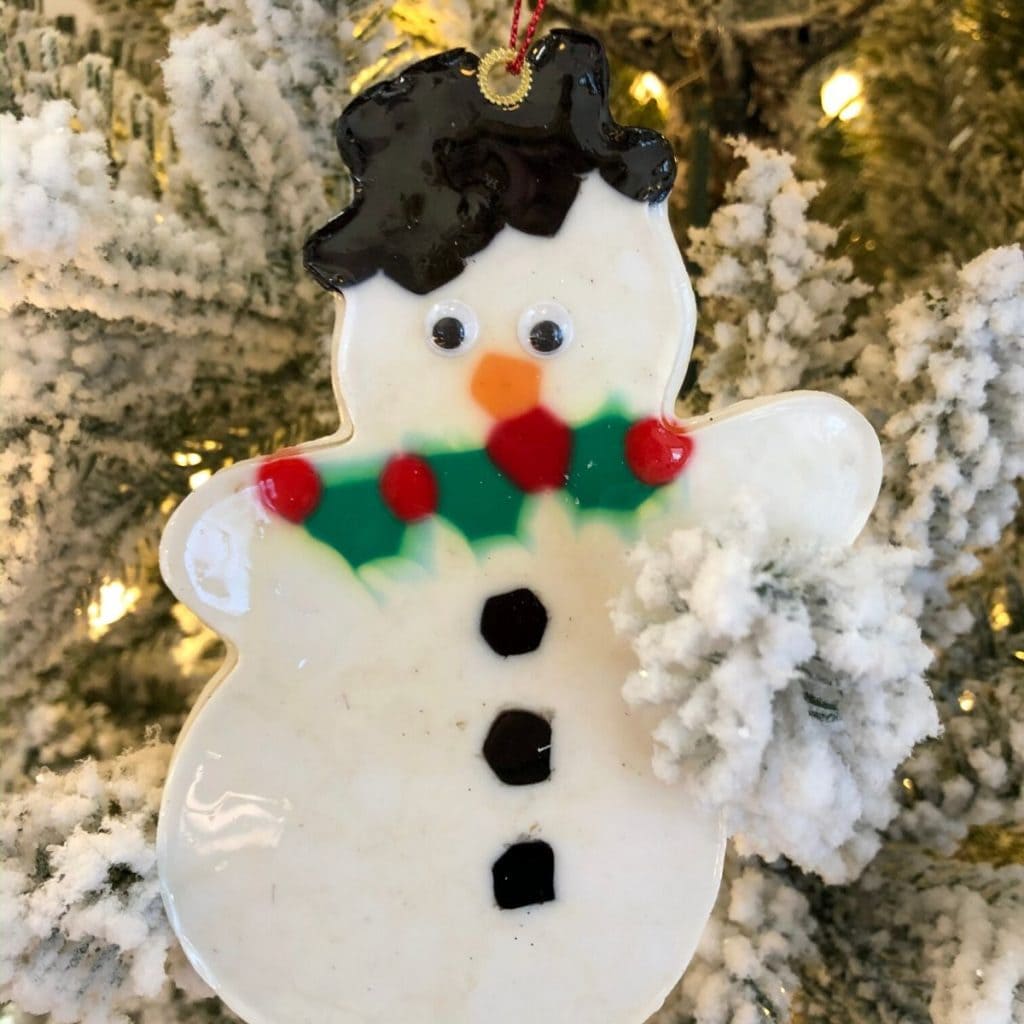
Snowman melting on grill Santa head melting beads Santa Head ornament Snowman ornament
The holidays are such a great time to create and participate in family Christmas traditions together. Homemade ornaments are personable, unique and fun! Create them for your Christmas tree or give them as a gift. This could be a new Christmas tradition that you do every year!




Oh...I like the smaller version of the melted pony beads. I've seen the huge ones, but the smaller project is much easier.
Yes! It was truly a lot of fun and my kids enjoyed making their own ornaments. Thank you.
We could not get the melted beads out of the cookie cutters and the foil was all stuck to the back! Disaster!!!!
Oh wow that does sound like a disaster! What kind of cookie cutters did you use? We found the silver ones worked best for us.